

Key Takeaways
- Six fluids need regular attention: engine oil, coolant, brake fluid, power steering fluid, transmission fluid, and windshield washer fluid.
- Always check fluids on a level surface with a cool engine unless the owner's manual specifies otherwise.
- Color and consistency reveal problems that level alone cannot - dark or gritty fluid often signals bigger issues.
- Topping up a fluid that keeps dropping is a symptom check, not a fix - always investigate the underlying cause.
- Your owner's manual specifies the exact fluid type required; substituting the wrong type can damage components.
What you will need
Why Fluid Checks Matter More Than Most Drivers Realize
Fluids are the circulatory system of your vehicle. Engine oil lubricates and cools internal metal components; coolant prevents overheating and freezing; brake fluid transmits the force you apply at the pedal to the wheels. When any of these fall low or degrade, the damage can be swift and expensive - sometimes catastrophic. Yet a full under-hood fluid check takes under 20 minutes and requires no special tools beyond what most households already have.
The goal of this walkthrough is not just to show you how to check levels, but to help you read what the fluid is telling you. A low level is one signal; discolored or contaminated fluid is another, often more serious one. Understanding both puts you in a stronger position to decide whether you can top up and move on, or whether a trip to a mechanic belongs on the calendar. For a broader view of how fluid checks fit into your vehicle's overall upkeep, see the maintenance schedule most drivers quietly ignore.
What you will need
What You'll Need Before You Start
The tools required are minimal, but having them ready before you open the hood makes the process cleaner and faster. The single most valuable resource is your owner's manual - every vehicle is different, and reservoir locations, dipstick procedures, and fluid specifications vary significantly between makes and models. If you don't have a printed copy, most manufacturers provide digital versions through their websites or apps.
Owner's Manual
Identifies the exact fluid specifications, dipstick locations, and service intervals for your specific vehicle.
Lint-Free Rags or Paper Towels
Used to wipe dipsticks clean and absorb spills without leaving fibers in fluid reservoirs.
Flashlight or Headlamp
Illuminates the engine bay so reservoir markings and fluid colors are clearly visible.
Nitrile Gloves
Protects skin from prolonged contact with brake fluid, coolant, and other chemicals.
Step-by-Step: How to Check Each Fluid
Work through each fluid in order. Doing them all at once gives you a complete picture of your vehicle's condition and helps you spot patterns - for example, if both oil and coolant are low, that correlation is worth flagging to a mechanic.
Prepare the vehicle and your workspace
Park on a flat surface and turn the engine off. For most fluid checks, allow the engine to cool for at least 30 minutes - a hot engine pressurizes coolant and can cause burns, and an engine that just ran will give you a slightly different oil reading. Pop the hood using the interior release lever, then locate and lift the secondary hood latch before propping the hood open fully. Lay out your rags and have the owner's manual within reach.
Check the engine oil
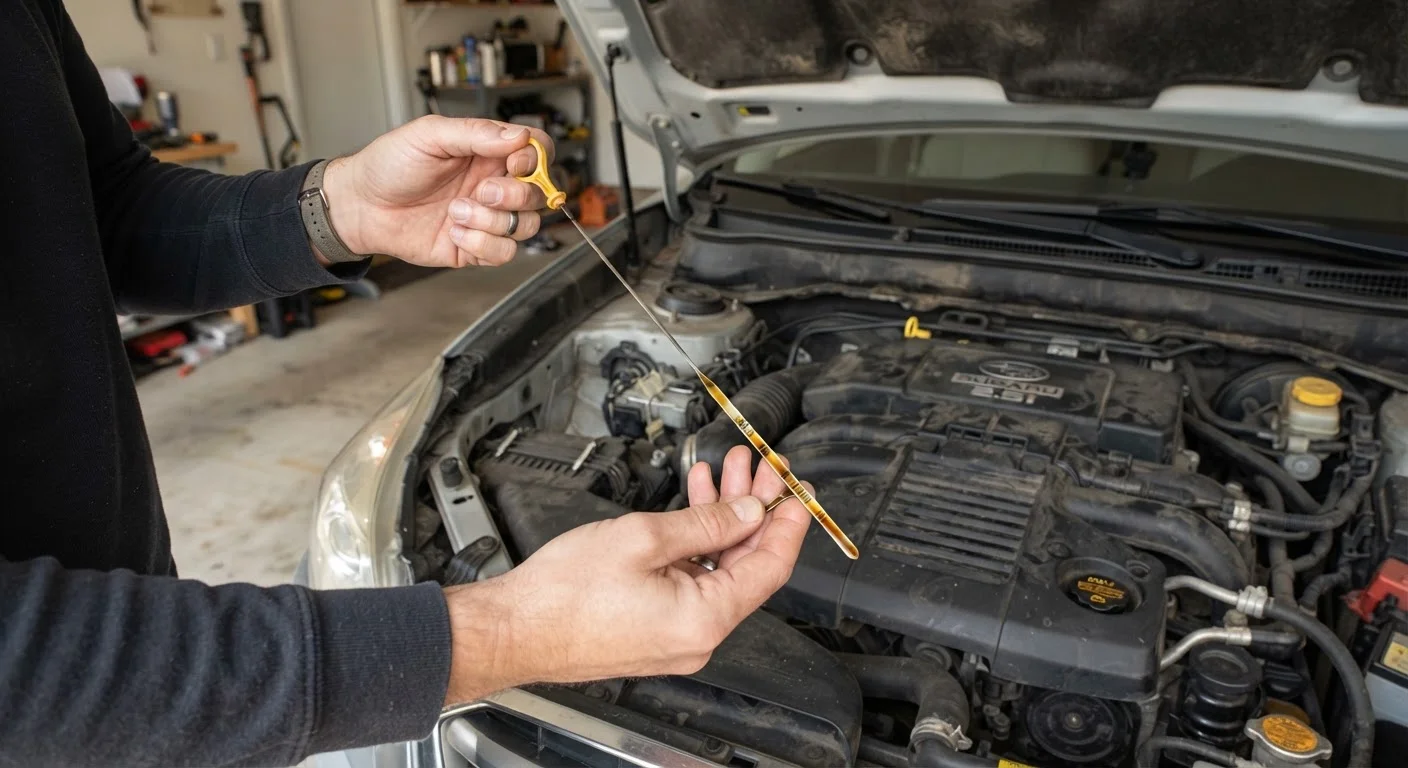
Locate the oil dipstick - typically a brightly colored loop or handle near the center of the engine. Pull it out, wipe it clean with a rag, reinsert it fully, then pull it out again. The oil level should sit between the two markers (MIN and MAX, or L and H depending on make). Equally important: look at the oil on the rag. Healthy oil ranges from amber to light brown. Black, gritty, or milky oil indicates it's overdue for a change or has a more serious problem, such as coolant intrusion.
Check the coolant (antifreeze)
The coolant reservoir is a translucent plastic tank connected to the radiator, usually marked with MIN and MAX lines on the outside so you can check the level without opening it. Do not remove the radiator cap on a hot engine - pressurized steam can cause severe burns. The coolant should be bright green, orange, or pink depending on type, and the liquid should be clear, not cloudy or rusty. If the reservoir is at or below the MIN line, top it up with the coolant type specified in your manual - mixing incompatible types can cause corrosion.
Check the brake fluid
The brake fluid reservoir sits on top of the brake master cylinder, usually near the firewall on the driver's side. It is also translucent, so check the level visually against the MIN/MAX markings without removing the cap if possible - brake fluid absorbs moisture from the air and should have minimal exposure. The fluid should be pale yellow or nearly clear. Dark brown or black fluid is degraded and should be flushed by a mechanic. A low brake fluid level can indicate normal pad wear or, more seriously, a leak - either warrants prompt attention.
Check power steering fluid and transmission fluid
Power steering fluid: Many newer vehicles use electric power steering and have no fluid reservoir at all - check your manual first. On vehicles with hydraulic steering, the reservoir (often labeled with a steering wheel icon) has MIN/MAX markings. The fluid should be clear to light pink or red; dark or burnt-smelling fluid needs servicing.
Transmission fluid: Some transmissions have a dipstick similar to the oil dipstick; others are sealed units that require a mechanic to check. If your vehicle has a dipstick, check it with the engine warm and running (in Park), following your manual's instructions exactly. Healthy transmission fluid is bright red; brown or burnt-smelling fluid suggests service is overdue.
Check the windshield washer fluid and wrap up
The washer fluid reservoir is typically a large blue-capped tank. This is the one fluid where the stakes of running low are purely about visibility rather than mechanical damage, but low washer fluid during winter or dusty conditions is a real safety issue. Top it up with a premixed washer fluid rated for your climate - plain water can freeze in cold temperatures and doesn't cut road grime effectively. Once all checks are complete, close the hood firmly until it latches, and note your findings so you can track trends over time.
Topping Up Is Not Always the Answer
If a fluid level keeps dropping despite regular top-ups, that fluid is going somewhere - through a leak, combustion, or internal system failure. Simply adding more fluid masks the symptom without addressing the cause. Have a mechanic diagnose any fluid that requires frequent replenishment, particularly oil, coolant, and brake fluid.
Reading the Results and Knowing When to Act
After completing your checks, you'll fall into one of three categories. First, everything looks good - levels are within range, colors are healthy, no unusual odors. Log the date and move on. Second, a fluid is low but otherwise looks clean - top it up with the correct type, note it, and monitor more frequently over the next few weeks. Third, a fluid is discolored, smells burnt, has debris in it, or keeps dropping - this is the category that requires a professional look, not just a top-up.
It's also worth knowing that dashboard warning lights are a last resort, not an early-warning system. By the time a low-oil or coolant light illuminates, the level may already be dangerously low. Regular manual checks catch problems well before any light comes on. If you do see a warning light illuminated, our guide on what your dashboard warning lights are actually telling you explains what each signal means and how urgently to respond.
Build It Into a Monthly Routine
A full fluid check takes 10-20 minutes and is most useful when done consistently. Pick a recurring trigger - the first Sunday of the month, before any road trip, or at every other fuel stop - and it will quickly become second nature. Consistent checks let you spot trends, such as gradual oil darkening or a slow coolant drop, long before they become problems.
Fluid checks are one of the most accessible forms of car maintenance for drivers at any experience level. If you're weighing which tasks to handle yourself versus leaving to a professional, DIY car maintenance vs. taking it to a shop provides a practical framework for making that call. And if you're building habits from scratch, car maintenance for new drivers is a good place to start.